Case Study5E
© COPYRIGHT MMXXI CHROMOSPHERE. ALL RIGHTS RESERVED.

2D/3D HYBRID ANIMATION / 2021
CASE STUDY NAVIGATION:
PART 1: Origins / PART 2: A New Pipeline / PART 3: Designing for Unreal / PART 4: Layout / PART 5: Rigging & Animation / PART 6: The Look / PART 7: Effects & Conclusion
STARTING FROM SCRATCH
In September 2020 we secured our Megagrant for Yuki and couldn’t wait to start exploring. But before we could begin production on an episode in Unreal, we had a lot to learn. We had made a couple of real-time projects before, but nobody at the studio had any experience with Unreal. Our first step was to get our Technical Art Director Theresa Latzko familiar with Unreal, which was made easier with an invitation to the Unreal Fellowship.
THERESA LATZKO (Technical Art Director): I was invited to the Unreal Virtual Production fellowship in September 2020 in preparation for starting production on Yuki, which would be Chromosphere’s first ever project utilizing the Unreal Engine. It was structured as a month-long very thorough crash course, focussing on Unreal as a linear storytelling tool, but also covering the basics of almost every aspect of the editor, with each participant completing a short film project to wrap it all up.
I had never used the engine before, so this definitely gave us a much needed knowledge basis, especially in terms of using the Sequencer tool. Moving into the Yuki project, I felt prepared enough to tackle most parts of the pipeline or at least knew where to start searching for answers.

^ STILLS FROM THERESA’S FELLOWSHIP PROJECT
TESTING ASSUMPTIONS
Theresa’s crash course in Unreal helped us start to see what an Unreal-based pipeline for Yuki might look like, but making it a reality would require testing certain assumptions in Unreal, such as whether we would be able to import the rigs we were already using in our traditional AfterFX/ Maya-based pipeline.
ANDREW WILSON (CG Artist): To adapt our existing rigs for Unreal, we had to just make sure that most things were connected to joints as opposed to in our traditional pipeline in Maya. There’s a lot of tools and deformers and grouping hierarchies that can be used in our traditional Maya pipeline that we needed to change in order to be suitable for Unreal. So everything had to be basically connected for the most part by joints. The eyeballs were probably the biggest thing, how they blinked and how the pupils deformed. Groups of joints in the previous rigs were then put into a group hierarchy, which was constrained to another hierarchy that also had joints.
^ ROCKET TURTLE RIG TEST IN UNREAL
THERESA : We discovered that the blend shapes translated well to Unreal, and we left them mostly untouched in the conversion process. It’s only deformer-based things which required adjustments. In addition to the eyeballs, there were a couple of wire deformers for any sort of wires, cables, etc (like the tubes on Yuki’s scuba outfit). We had to recreate all of those as joints. But for the blend shapes themselves, we didn’t really have to do much extra work there.
^ SCUBA YUKI RIG TEST IN UNREAL
Another big question was whether we could use stepped animation (animation which only uses keyframes every other frame) in the engine. Stepped animation plays a big part in the Yuki 7 style, giving it a slight stop-motion feeling, so figuring this out was key.
THERESA: Since we animate stepped in Maya, the curves are set to constant interpolation. In Unreal, the FBX export seems to pick up on that correctly, and even though it doesn’t exactly like safe tangents, it still saves the curves in a way that they end up reading in Unreal as stepped. If you actually go through the animation in slow motion in Unreal, you can see that it’s not truly stepped; you can see a jump. Because it’s so fast, and we’re rendering at 24 frames per second, you don’t actually see it in the render. If we were actually making a game, this would be tricky, because the game would run at 60 FPS. But because we’re just like rendering it after, it does read as stepped.
^ 24 VS. 60 FPS COMPARISON
SOURCE CONTROL
In order to collaborate as a team in Unreal, we needed to utilize a “source control” solution. Source control software hosts your project in a cloud, and allows different people to all work on different parts of the project at the same time. For Yuki 7, we ended up using Perforce hosted on an AWS server.
^ DEMONSTRATING PERFORCE INTEGRATION WITH UNREAL
THERESA: Originally we were just using Google Drive and it was pretty nail biting because we didn’t know what would happen if two people opened the project at the same time. To me, Perforce felt pretty seamless. A couple times we would run into an issue in the project and have to go back on a file and figure out which one of these check-ins were actually the problem. So Perforce gave us the ability to find those problems and fix them.
MAKING A PROOF OF CONCEPT
The best way to really get familiar with Unreal was to try making a complete scene. At this point in the project, we knew Yuki and her friends were going to be spending a fair amount of time in a speedboat, so it made sense to use that setup for our first test scene. Our Art Director Elaine Lee created a styleframe which became the basis for the POC.
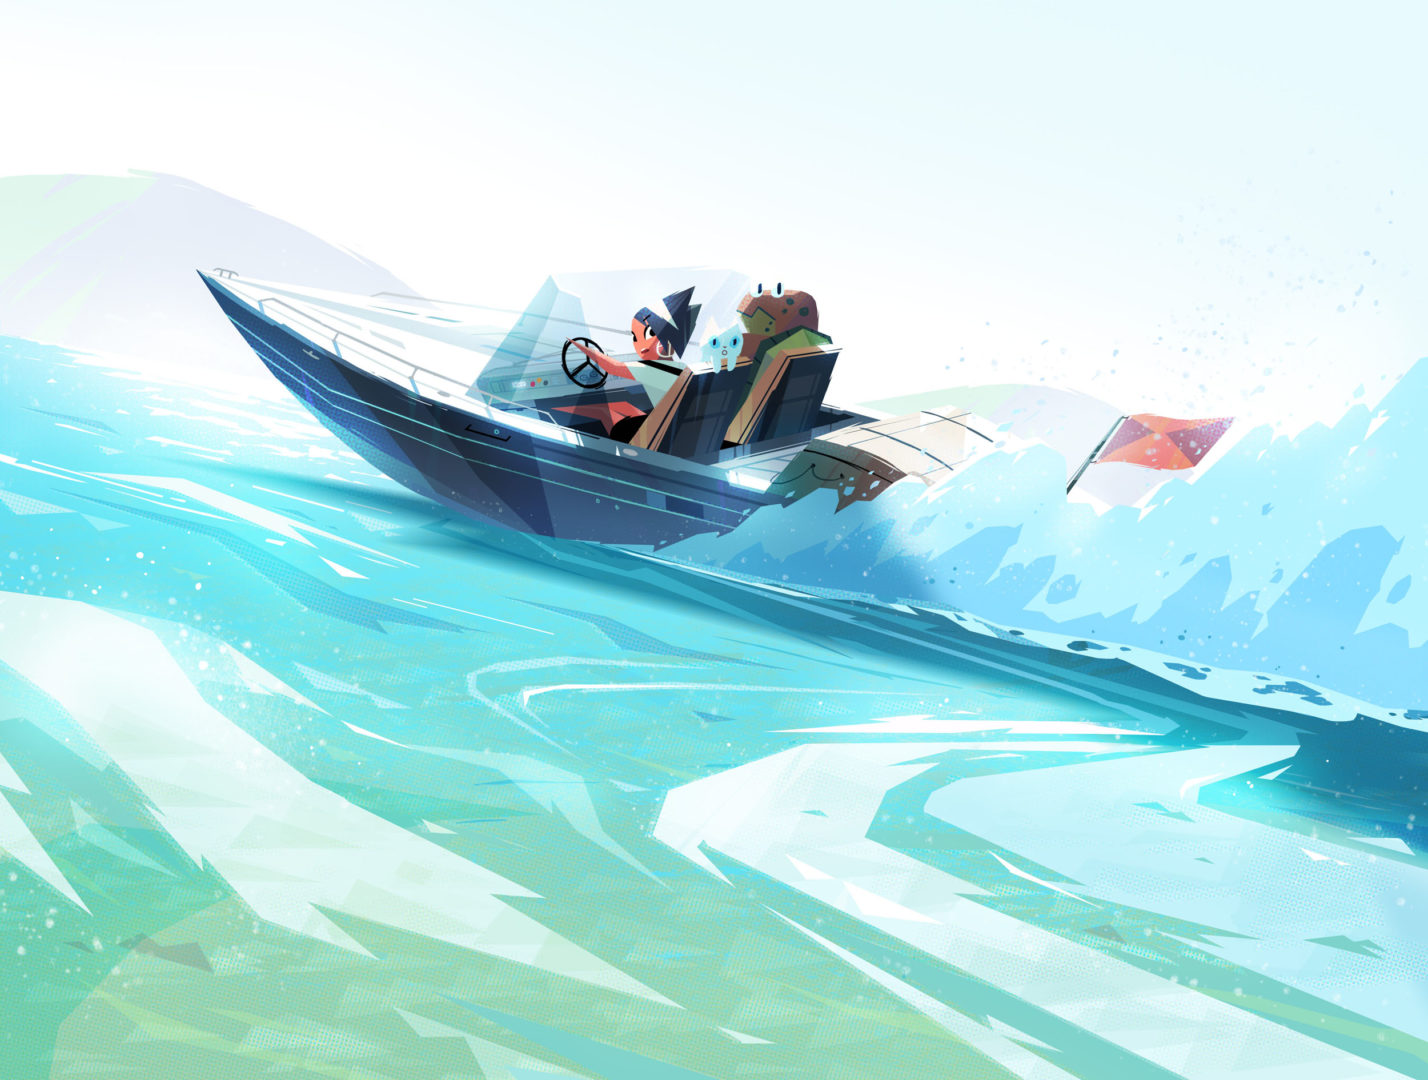
^ STYLEFRAME BY ELAINE LEE FOR PROOF OF CONCEPT
THERESA: The POC is where we really started to answer a lot of questions about what would be the best way to set up our animation pipeline. For example, we had the character rigs and the animation in Maya, but in Unreal, which parts of the character do we actually animate? How do we get the characters to be attached to the boat and move them around together? And is the way that we’re doing that robust and can we change it on the fly if we need to? For the POC we tried using these camera rails to track the boat along. Later in the project we moved away from that in favor of just animating the cameras with keyframes. It was figuring out what worked best for our process.
^ ANIMATION BY TOMMY RODRICKS
Ultimately it was decided that it worked best for us to animate the characters in Maya, while the boats and cameras were animated in Unreal. Later in the project, Theresa would develop a tool to solidify this process of moving back and forth between Maya and Unreal. For the time being in the POC, we were just beginning to test the water effects which would later become a starring element of the episode.
THERESA: There are two different particle systems in Unreal. There’s an old one called Cascade, and then this new one called Niagara. Niagara was pretty new at that point. I tried it out, still not being entirely sure if we should use that or Cascade. It felt pretty modular and easy to use, because it felt pretty obvious that you could just look into any part of the scene or Unreal and fetch the information you need and base outputs on that. It felt more productive to just learn the new difficult to understand setup right away as opposed to kind of diving into the old thing that might have a lot more examples and documentation available out there. Niagara is the thing I learned the most about over this project where I feel like I just kept having to learn new things. It does have a lot of moving pieces and there’s bad ways of doing things that aren’t super flexible and then I feel like you slowly learn better ways of using it where you have assets with more flexibility later that you can fit to a lot of other situations.
^ EARLY EFFECTS TEST IN NIAGARA BY THERESA LATZKO
The POC was also the first time we tackled creating an ocean surface for the project. Based on Elaine’s styleframe, we knew we wanted to create something which felt kinetic and fluid, but also had a very distinct stylization. Figuring out how to capture that feeling became one of Theresa’s biggest technical challenges on the project.
^ EARLY OCEAN SHADER DEPTH TEST BY THERESA LATZKO
THERESA: I was procedurally generating pretty much any texture from the start. Generally using noise to generate patterns in Unreal, I kind of gravitate towards that instead of trying to solve things with textures, because you just know it’s not going to look tidy or repetitive if you zoom out. And since we’re not really having to do things in real time, we also don’t always have to worry about the performance implications of just putting it together fully procedurally.
^ FINISHED PROOF OF CONCEPT SCENE
Having done our first tests with animation, cameras, and effects in Unreal, we were ready to start diving into the main production of the third episode. In the next chapter, we will discuss our pre-production process and how it was uniquely shaped by the Unreal pipeline.
CASE STUDY NAVIGATION:
PART 1: Origins / PART 2: A New Pipeline / PART 3: Designing for Unreal / PART 4: Layout / PART 5: Rigging & Animation / PART 6: The Look / PART 7: Effects & Conclusion
PRODUCTION CREDITSCRÉDITSクレジット
A CHROMOSPHERE Production
EXECUTIVE PRODUCERS
Elizabeth Ito
Karen Dufilho
BASED ON A CHARACTER CREATED BY
Kevin Dart
STARRING
Xana Tang
Piotr Michael
Julie Nathanson
WRITTEN BY
Kevin Dart
Karen Dufilho
Bryan Wolfson
STORYBOARDS
Dashawn Mahone
Jessie Wong
Michael Yates
Eusong Lee
Chris Mitchell
ART DIRECTION
Jasmin Lai
Sylvia Liu
VISUAL DEVELOPMENT
Maxime Dupuy
Benjamin Flouw
Monica Grue
Elaine Lee
Baptiste Lucas
Rebecca Shieh
Lauren Zurcher
Tor Aunet
CHARACTER DESIGN
Keiko Murayama
Linda Fong
Claire Nero
Jojo Park
PROPS & FX
Efrain Farias
Linda Fong
Elaine Lee
Emily Paik
Laura Swalley
Junyi Wu
Lauren Zurcher
COLOR STYLING
Xanthe Bouma
Linda Fong
LEAD ANIMATOR
Tommy Rodricks
ANIMATION
Lauren Hammond
Matt Herring
Natan Moura
Mette Tange
Lauren Adassovsky
Rachel Reid
Taylor Yontz
LEAD COMPOSITOR
Stephane Coedel
COMPOSITING
Simone Ghilardotti
Rob Ward
ANIMATIC EDITING
Stephane Coedel
Eusong Lee
Hugo Morales
TECHNICAL ART DIRECTOR
Theresa Latzko
CG GENERALISTS
Andrew Wilson
Lucy Xue
Katherine Diaz
Shreeya Shetye
RIGGING
Lauren Hammond
LIGHTING & RENDERING
Sharon Lee
Camille Perrin
POST PRODUCTION SOUND SERVICES
Boom Box Post, Inc.
SUPERVISING SOUND EDITOR
Brad Meyer, MPSE
RE-RECORDING MIXER
Kate Finan, MPSE
Jeff Shiffman, MPSE
SOUND EDITORS
Katie Maynard, MPSE
Jessey Drake, MPSE
FOLEY EDITOR
Nate Grady-Reitan
DIALOGUE EDITOR
Xinyue Yu, MPSE
ASSISTANT SOUND EDITORS
Tim Vindigni
Zanne Hanna
RECORDING ENGINEERS
Krandal Krews
Jon Cooper
NATIVE AUDIO – DAN NATHAN
Dialogue Recorded at
SALAMI STUDIOS
LEAD DIALOGUE MIXER
Mark Mercado
ASSISTANT MIXER
Ranen Nowlin
UNREAL ENGINE SPECIAL THANKS
Rob Difiglia
Karen Dufilho
Marc Petit
Alex Paschall
Sam Dieter
Tony Bowren
Matt Oztalay
Mikko Martikainen
Takashi Kuribayashi
Sean Spitzer
Claudette Dwyer
Michelle Blaser
Michael Neely
YUKI 7 THEME
Performed by The Go! Team
Written by Ian Parton
YUKI 7 END THEME
Performed by The Go! Team (feat CHAI)
Written by Ian Parton
The Go! Team appears courtesy of Memphis Industries Ltd
CHAI appears courtesy of Sony Music Entertainment (Japan) Inc.
ORIGINAL SCORE
Boe Weaver
PRODUCTION ART ASSISTANT
Ashley Ma
PRODUCTION SUPERVISOR
Bryan Wolfson
DIRECTOR OF PRODUCTION
Myles Shioda
PRODUCER
Sarah Kambara
CREATIVE DIRECTOR
Kevin Dart
The stories, names, characters and incidents portrayed in this productions are ficticious. No identification with actual persons (living or deceased), places, buildings, and products is intended or should be inferred. No animals were harmed in the making of this motion picture
Copyright MMXXI Chromosphere.
Yuki 7 is a registered trademark of Chromosphere.